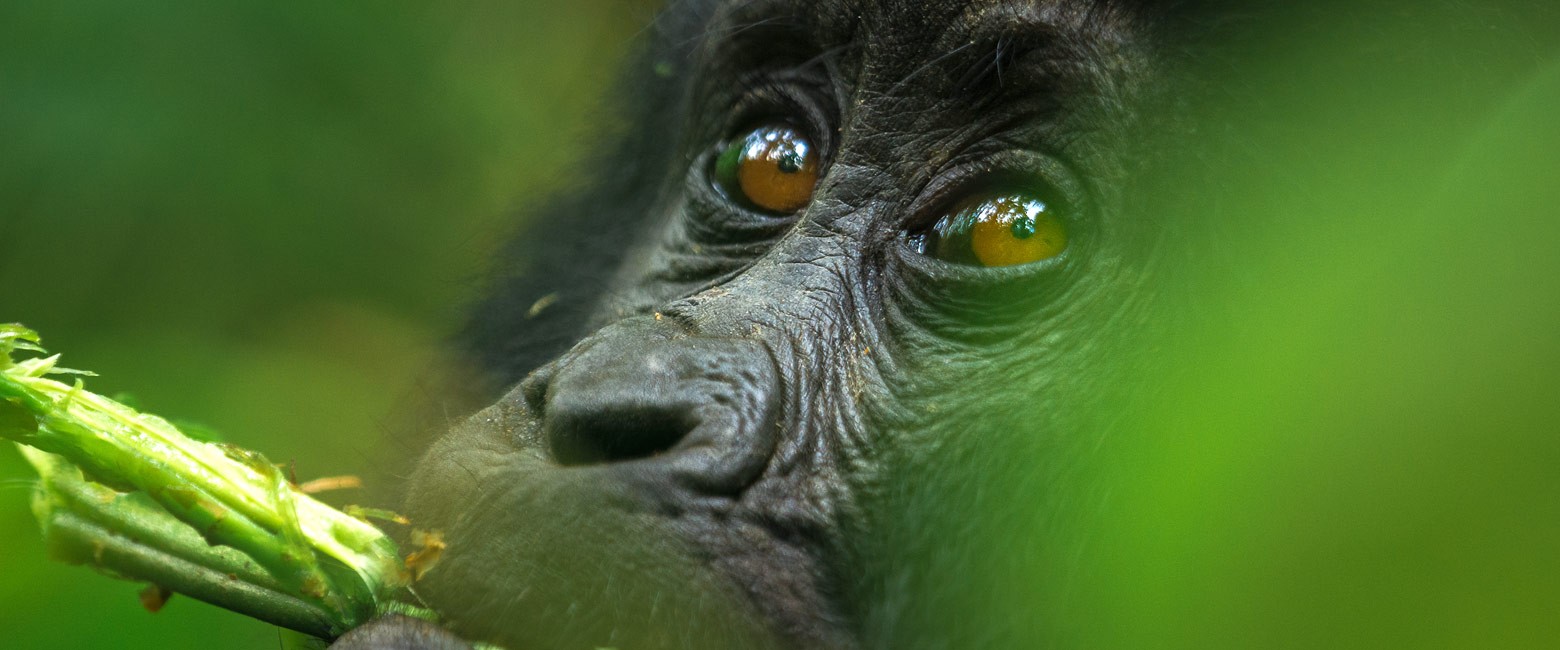
Bwindi Impenetrable Forest in southwestern Uganda is one of the most rewarding and technically demanding places to photograph wildlife. The mountain gorillas that live there sit in deep shade beneath a dense canopy, often against bright patches of sky or tangled green backgrounds. Add moisture, steep terrain, and a strict one-hour viewing window, and you have a scenario that punishes unprepared photographers. This guide covers gear, camera settings, technique, and field habits that will help you come home with sharp, evocative images.
Understanding the Light in Bwindi
The forest floor receives only a fraction of the light that reaches the canopy. On a typical trekking morning, expect dim, diffused light with occasional shafts of sun breaking through. Cloud cover and rain are common, which further reduces light but also softens contrast, which is actually helpful for gorilla portraits.
The main challenge is dynamic range. A silverback in shadow may sit next to a sunlit leaf or a bright gap in the trees. Your camera will struggle to expose both. Accept this limitation early and decide what matters most: the gorilla’s face and eyes. Everything else is secondary.
Gorillas are also very dark. Their black fur absorbs light and hides detail, so metering errors are common. Your goal is to preserve texture in the fur and brightness in the eyes without blowing out highlights.
Choosing the Right Gear
Camera body. A mirrorless or DSLR camera with good high-ISO performance is ideal. Full-frame sensors handle noise better, but modern APS-C and even Micro Four Thirds cameras can produce excellent results if you expose carefully. Prioritize a body with fast, reliable autofocus, eye detection if possible, and weather sealing.
Lenses. Fast lenses matter more here than long ones. Gorillas are often close, sometimes just a few meters away, and park rules require you to keep a distance of at least seven meters, though gorillas do not always follow that rule themselves. A versatile zoom such as a 70-200mm f/2.8 is a favorite among professionals. A 100-400mm or 100-500mm zoom gives reach but typically opens only to f/4.5-f/6.3, which will push your ISO higher. If you can carry only one lens, a 70-200mm f/2.8 or a 24-105mm f/4 for wider contextual shots gives flexibility. A 50mm f/1.8 or 35mm prime is light and useful for environmental portraits when the gorillas are close.
Support. Tripods are impractical on steep, muddy trails and in thick vegetation. Many parks also discourage them. A monopod is allowed in some cases but can be awkward. Instead, rely on image stabilization, good handholding technique, and a lens or body with in-body stabilization.
Flash. Flash photography is strictly prohibited when viewing gorillas. It can startle and stress the animals. Leave it at the hotel and plan to work with natural light only.
Batteries and memory cards. Cold, damp conditions drain batteries faster. Carry at least two spares, kept in a zippered inner pocket. Bring multiple memory cards or one large card, since you will shoot a lot during the hour.
Protecting Your Equipment
Bwindi is a rainforest, so humidity and sudden downpours are part of the experience. Pack a waterproof camera rain cover or a simple shower cap and rubber band as a backup. Use a dry bag inside your daypack, and include silica gel packets. Wipe the lens with a microfiber cloth regularly, since condensation and mist are constant.
When moving between humid forest and warmer, drier environments, let your gear acclimatize slowly inside a closed bag to reduce lens fogging. Dust and mud are also common on the trail, so change lenses sparingly, ideally in a sheltered spot before you reach the gorillas rather than in front of them.
Camera Settings for Low Light
Shooting mode. Manual mode with Auto ISO is the most reliable approach. You control aperture and shutter speed directly, while the camera adjusts ISO to maintain exposure. Aperture priority is a good alternative if you prefer simplicity, but set a minimum shutter speed if your camera allows it.
Aperture. Open up as wide as your lens allows, typically f/2.8 to f/5.6. Shooting wide open lets in the most light and creates a pleasing blur behind the subject. However, at very close distances the depth of field becomes razor thin, so stopping down slightly to f/4 or f/5.6 can keep the whole face sharp rather than just one eye.
Shutter speed. Gorillas move slowly most of the time, but they chew, turn, blink, and gesture constantly. Aim for at least 1/250 second for general shots. For a resting adult, 1/160 may work with good stabilization. For playful juveniles, which can be remarkably fast, push toward 1/500 or faster. A blurry gorilla is rarely salvageable, whereas noise can be reduced in editing.
ISO. Do not fear high ISO. Modern cameras produce usable images at ISO 3200, 6400, and sometimes higher. A sharp, slightly grainy photo is far better than a clean, blurry one. Set an upper limit in Auto ISO, such as 12800 on a full-frame body, and adjust as needed.
Exposure compensation. Because gorillas are dark, the camera’s meter may try to brighten them excessively, or the bright background may fool it into underexposing. Start with exposure compensation at -0.3 to -0.7 stops if highlights in the background are blowing out, and check your histogram. Watch the highlights rather than the shadows, since you can recover shadow detail from a RAW file more easily than clipped highlights.
Metering mode. Spot or center-weighted metering helps prioritize the face. Evaluative metering can work well in even shade but may be fooled by bright gaps. Experiment during the first few minutes and adjust.
File format. Shoot in RAW. It gives you far more latitude to recover shadows, correct white balance, and manage noise. If storage allows, avoid RAW+JPEG to maximize buffer speed.
White balance. Forest light often has a green or blue cast. Auto white balance is generally fine when shooting RAW, since you can fix it later. A setting such as Cloudy or Shade can add warmth if you want to reduce the green tint in-camera.
Autofocus Techniques
Autofocus in dark, leafy environments can hunt, especially when branches and foliage sit between you and the animal. Use a single focus point or small zone and place it directly on the gorilla’s eye. If your camera has animal eye detection, test it, but be ready to switch to manual point selection when branches interfere.
Use continuous autofocus (AF-C or AI Servo) for moving subjects, particularly active juveniles. For a stationary silverback eating or resting, single-shot AF can be more precise. Back-button focus is helpful, as it lets you separate focusing from the shutter release and recompose quickly.
Be aware that foreground leaves can steal focus. Move slightly to find a clear line of sight, and avoid sudden movements. If autofocus continues to fail, switch to manual focus and use focus peaking or magnification where available.
Handholding and Stability
Since you will rarely use a tripod, technique is critical. Plant your feet shoulder-width apart, tuck your elbows into your body, and exhale gently before pressing the shutter. If there is a tree trunk, rock, or your guide’s stick nearby, lean against it for added support. Kneeling or sitting often provides a more stable platform than standing and also places you at the gorilla’s eye level, which makes for more intimate images.
Turn on lens or in-body image stabilization. If you are using a lens with a stabilization mode switch, choose the standard mode rather than panning mode. Shoot in short bursts, since the second or third frame in a burst is often sharper than the first.
Composition and Storytelling
With limited time, think about variety. Capture tight portraits, wider environmental shots that show the gorillas in their forest home, and behavioral moments such as grooming, feeding, mothers cradling infants, and silverbacks surveying their group.
Focus on the eyes. Sharp, expressive eyes make a portrait. If light is poor, even a single catch light brings the face to life. Look for moments when the gorilla’s face turns toward a patch of brighter light.
Pay attention to backgrounds. Distracting bright spots or tangled branches can pull attention away from the subject. Small shifts in position, even a step left or right, can transform a cluttered frame into a clean one. Using a wider aperture to blur the background helps.
Include scale and context occasionally. A baby gorilla clinging to bamboo or a silverback framed by hanging vines tells a story that a tight face shot cannot.
Working With the One-Hour Rule
Your time with the gorillas is limited to one hour, and it can feel shorter once the animals begin moving. Prepare before you reach them. Set your camera to a sensible starting configuration, check your battery and card, and clean your lens. Many rangers brief you before the final approach, and this is a good moment to adjust settings.
Spend the first few minutes observing rather than shooting. Notice where the light falls, how the gorillas move, and which individuals are most photogenic. Then begin shooting deliberately instead of spraying frames. Reviewing images constantly on the screen means you may miss action, so check occasionally and trust your preparation.
Respecting the Gorillas and Park Rules
Ethical conduct always comes first. Maintain the recommended distance, keep your voice low, and avoid sudden movements. Do not use flash, and do not attempt to touch the animals. If a gorilla approaches, follow your guide’s instructions, usually by slowly stepping back and looking down. Never block a gorilla’s path.
Be mindful of other trekkers as well. Groups are small, but space can be tight, so take turns and avoid blocking views. Following these rules protects both the gorillas and the experience that makes Bwindi so special.
Post-Processing Tips
Back at your lodge, take time to process your images. Lift shadows modestly, recover highlights, and adjust white balance to neutralize green casts. Apply noise reduction carefully, since heavy smoothing can erase fur texture. Modern AI-based denoising tools can rescue high-ISO shots that once would have been unusable. Add a touch of clarity or contrast to the eyes, and consider a subtle vignette to draw attention to the face.
Avoid over-brightening. Gorillas are dark animals, and preserving a natural, moody look often feels more authentic than a heavily lifted exposure.
Final Thoughts
Photographing gorillas in Bwindi is as much about patience and respect as technical skill. The forest’s low light is a challenge, but it also creates mood, depth, and intimacy that bright conditions cannot match. Bring fast glass, embrace high ISO, prioritize sharpness and eye focus, and protect your gear from the damp. Above all, remember to put the camera down now and then and simply watch. The memory of a silverback’s calm gaze or an infant’s curiosity will stay with you long after the images are edited and shared.